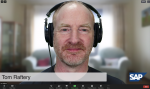
In my last blog post I talked about how I have used the time at home to improve the audio quality of my Digital Supply Chain podcast. Now in this post I want to talk about how I have gone on to improve the video quality I’m able to put out – this works for video recording, for live-streaming, but as a nice byproduct, also for Zoom/Team calls, webinars, and the like.
So, how did I fare? You be the judge. In the images above (click to enlarge) you can see the before and after images from Zoom calls. In the first image, I am simply using my laptop’s built-in webcam for the call, whereas in the second image I’m using my all new setup which is capable of live-streaming 4K video. Scroll to the end of this post for a video showcasing the results 👇🏻
So, how did I achieve this? To be honest, it was a steep learning curve, but I’ll try to summarise what I learned below.
- it is going to sound obvious, but to get high quality 4K video, you are going to need a good camera – one that is capable of putting out 4K video (duh!) and  clean HDMI (I had no idea what “clean HDMI” was before embarking on this journey – fortunately my colleague Timo Elliott had embarked on this journey long before this crisis, so he was able to give me some pointers, including the need for a camera with clean HDMI out). I opted for a Canon EOS R which is a bit of overkill for this job, but I already had a collection of good Canon lenses, so it made sense for me to purchase a camera capable of utilising them. A quick Google search will bring up a long list of articles each with lists of cameras with clean HDMI out.
- The next thing is to sort out how to get the HDMI feed from the camera into the laptop. The HDMI port on most computers is for putting out a HDMI signal (to an external monitor or data projector, for example), not for receiving one, so you need a HDMI capture card to convert the HDMI signal to a USB one that you can then feed into the USB port on the computer. Many people recommend the Elgato Camlink capture card, but they have been out of stock everywhere I looked for months now, so I opted for a Digitnow! one instead (I hadn’t come across the brand before, but it had good reviews), and it is doing a superb job!
- Now that we have the 4K video coming from the camera into the computer we need to be able to use it for recording video, for Zoom/Teams calls, for Webinars and/or live-streaming. To achieve this you need software like ManyCam or if you are Mac based (like me), you can use ecamm Live. I have used both, and I can strongly recommend Ecamm Live over ManyCam for a variety of reasons. ManyCam is glitchy (currently it has issues working with Zoom), its user interface is challenging to navigate and settings are often forgotten by the app, and support isn’t the best. ecamm Live on the other hand has a very easy to use interface, it is rock solid in terms of reliability, and fortunately, I have not had any reason to check out whether or not it has good support, but I suspect it does(!). The other thing that really sold me on Ecamm Live is that there is a really good set of short tutorials on its use over on YouTube. Checking these out before getting the software allowed me to see its capabilities, and ease of use. ecamm also has a 14 day trial option (without asking for credit card details) so you really can try before you rent (yes rent – Ecamm is a subscription service, not a purchase and I see this as a good thing because the developers are constantly rolling out new features, so it is continuously improving). By the way, to use your 4K video in Zoom or Teams, you will need to install the Virtual Cam option which is only available with the ecamm Live Pro  option.
- The next thing you will need is a green screen (aka chroma key). This can be as easy pinning some green cloth to the wall behind you, or you can go for a commercially available one. I chose the latter route and ponied up for an elgato Green Screen. This one is handy because it is free standing, and doesn’t require any supports. elgato also have a green screen that can be hung from the ceiling.
- You should also have key lights. These are lights which you place behind your screen facing you to illuminate your face. Ideally you have two, one on either side of your screen for even illumination and they should give off controllable, diffuse light, so the light on your face is not too harsh. I opted for a pair of Elgato Key Light Airs. They have built-in wifi and come with an app for your smart phone, and your computer so you can quickly and easily adjust your light temperature and brightness. For the app to work on your computer though, your computer needs to be connected to wifi. Not a problem, right? Wrong, because…
- The final piece of the puzzle is, your computer should use a wired connection for Internet access, not wifi. Wifi is great for most things, no doubt about it, but when you need a rock steady connection for pushing out broadcast quality video, a wired connection is your only real option. Also, obviously a good internet connection is required, but if you’re working from home, you already have that, don’t you?
And the results?
I shot this quick video to let you see the kind of output you can expect:
That’s it. It took a few trials and errors, but now I have the ability to output amazing broadcast video, either in a Livestream, or recorded like the one above.
If you have any comments or questions, feel free to leave them in the comments below, and I’ll try my best to answer them.